Css: полное руководство по функции calc()
Содержание:
- Use em or px for font sizes
- min(), max()
- Процент
- Using Only EMs to Make a Header Element
- Дополнительно
- @media запросы
- Пиксели: px
- CSS Properties
- Why Use rem Units:
- rem Unit
- Font Sizing with Rem Units
- What About rems and Sass?
- CSS Properties
- vh и vw
- ex и ch
- Предотвращение наследования
- Why Use em Units
- Поддержка CSS-переменных браузерами
- CSS Properties
- Абсолютные единицы измерения длины в CSS
- vmin и vmax
Use em or px for font sizes
CSS inherited the units (point) and (pica) from typography. Printers have traditionally
used those and similar units in preference to or
. In CSS there is no reason to use , use whichever unit you prefer. But there is a good
reason to use neither nor any other absolute
unit and only use and .
Here are a few lines of different thickness. Some or all of
them may look sharp, but at least the 1px and 2px lines should be
sharp and visible:
0.5pt,
1px,
1pt,
1.5px, 2px
If the first four lines all look the same (or if the 0.5pt line
is missing), you are probably looking at a computer monitor that
cannot display dots smaller than 1px. If the lines appear to
increase in thickness, you are probably looking at this page on a
high-quality computer screen or on paper. And if 1pt looks thicker
than 1.5px, you probably have a handheld screen.
The magic unit of CSS, the , is a often a good
unit to use, especially if the style requires alignment of text to
images, or simply because anything that is 1px wide or a multiple
of 1px is guaranteed to look sharp.
But for font sizes it is even better to use .
The idea is (1) to not set the font size of the BODY element (in
HTML), but use the default size of the device, because that is a
size that the reader can comfortably read; and (2) express font
sizes of other elements in : to make the H1 2½ times as big as the normal, body
font.
The only place where you could use (or or ) for setting a font size is in
style sheets for print, if you need to be sure the printed font is
exactly a certain size. But even there using the default font size
is usually better.
min(), max()
Функция возвращает минимальное из переданных значений, — максимальное. При использовании процентов или выбираемое значение будет динамическим и будет зависеть от внешних условий. Например:
Если поресайзить окно с примером, можно увидеть как это работает.
Если вычисленное значение для меньше , ширина блока будет равна . Как только станет больше , функция выберет меньшее значение, то есть , и дальше блок тянуться не будет.
Функция будет выбирать подходящее значение учитывая ширину окна в данный момент.
Этот код не делает ничего особенного, что не умел бы CSS без математических функций: точно такое же поведение можно получить задав и :
Оба варианта для сравнения:
Порастягивайте демо, чтобы увидеть, что разницы в поведении блоков нет.
На первый взгляд, и не делают ничего интересного, но если подумать, как много мест в CSS, где можно управлять диапазоном значений?
Это доступно только для ширины и высоты:
- , ,
- , ,
и их аналогов, привязанных к направлению письма:
- , ,
- , ,
У нас нет, например, или , но благодаря математическим функциям, можно добавить умную динамику практически в любое значение. Например, в размер шрифта:
Поресайзите демо, и вы увидите, что при растягивании шрифт будет бесконечно расти, но при сужении, как только станет меньше или равным , размер шрифта застынет на этом значении.
Если попытаться реализовать подобное на JS, пришлось бы отслеживать ресайз окна, получать вычисленное значение, и при превышении заданного порога, фиксировать значение на определённом уровне. При использовании и браузер всё делает сам: отслеживает изменение значений и, при необходимости, фиксирует их — нам нужно просто выбрать функцию и задать диапазон значений.
Это будет работать во всех свойствах, которые используют размеры, в том числе в тенях, градиентах и прочем. Пример с :
Размер тени будет зависеть от размера окна браузера, минимальное значение — .
Экспериментируя с функциями и можно заметить, что они дают возможность управлять или минимальным значением, или максимальным, но нельзя контролировать и то, и другое одновременно. Хотя совершенно логичным выглядит желание, например, задать размер шрифта, который будет расти в диапазоне от минимального значения до максимального и не выходить за эти значения.
Для такого есть ещё одна функция:
Процент
С процентом все более понятно, он устанавливается относительно родительского блока. Если ширина родительского блока 800px, тогда 50% будет 400px. За последние годы адаптивный дизайн становится стандартом в веб-дизайне, так что единица измерения процент используется все чаще.
Давайте рассмотрим следующий пример, в отрывке кода ниже задается значение ширины, равное 60%, блокам классов .container и .main, но у блоков этих классов разные родительские блоки, так что они будут разной длины. Блок класса .container займет 60% ширины видимой области браузера, а блок класса .main займет 60% ширины своего родительского блока класса .container.
.container {
    width: 60%;
    margin: 100px auto;
    background-color: #eaeaea;
    padding: 1%;
    height: 250px;
    font-family: Arial;
    text-align: center;
}
.main, .aside {
    line-height: 253px;
}
.main {
    width: 60%;
    height: 100%;
    float: left;
    background-color: #ccc;
}
.aside {
    width: 40%;
    height: 100%;
    background-color: #aaa;
    float: left;
}
Таким образом, мы получим следующий результат:
Так как процент тоже относительная единица измерения, с ним есть такая же проблема, как и с единицами измерения EM. Может быть сложно быстро сосчитать в уме, сколько процентов от 500px составит 15px. Это обычно происходит, когда мы переводим единицы измерения пиксели из фазы дизайна в веб-страницу. Есть два пути, которыми можно решить эту проблему: Вы можете традиционно считать с помощью калькулятора, или, если Вам удобно использовать предобработчик CSS, Вы можете использовать функцию percentage()из Sass.
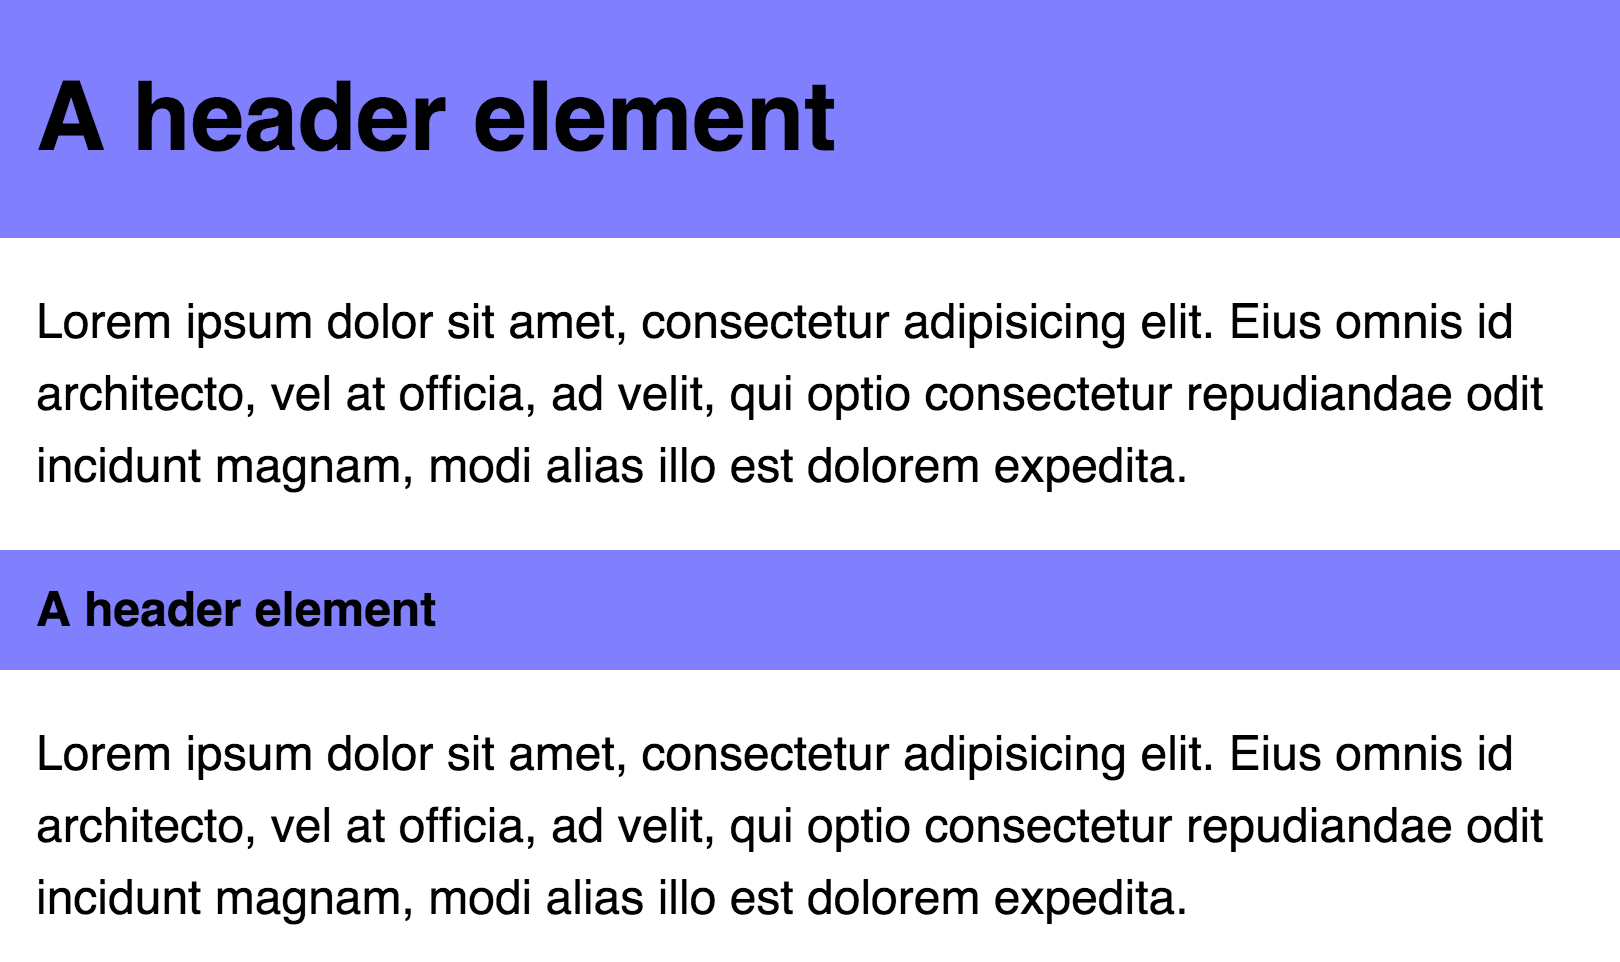
Using Only EMs to Make a Header Element
An implementation isn’t far from the code we left off. All we have to do is change to .
Both and will look exactly the same as their counterparts.
Is that it?
Nope!
It’s highly unlikely that your website contains only one header element. We have to consider how this header interacts with other elements on your page.
It’s common to see other elements before or after the header, like this:
 Header elements have other relationships surrounding it
The markup for this set of elements is:
For the styles, we need to add some s to the left and right of the tags.
 Uh oh. `padding` on the large header are doesn’t align with the text
Nooo! 🙁
The on the left and right of is too big!
If you insist on using only , the only way to fix this problem is to redeclare the and properties on the large header:
Left and right paddings are now aligned!
Notice the pattern here? The of is twice the size of the of . Yet, the and of are half the and of !
Like in the above case, we can simplify the code if you are open to using a combination of and in your code. Specifically, for left and right s and for top and bottom s:
As you can see, the unit is useful when you need to scale a property with it’s . However, you’ll run into problems if you need to size the property accordingly to the root .
It’s much clearer to see how and can work together in a component now, isn’t it?
Now, let’s take it a notch further and see how the header and paragraph interacts with a grid.
Дополнительно
Немного дополнительной информации по адаптивной вёрстке
@media запросы по размерам viewport могут быть как по ширине, так и по высоте, но используется обычно реже
@media запросы можно комбинировать, например нужны только стили для планшетных экранов в диапазоне от 576px до 767.98px
Стили назначенные в таком @media запросе будут применены только если все условия выполнены
Можно определять свойства сразу для нескольких разных условий — такой @media запрос выполняется если хотя бы одно из перечисленных условий выполнено, например экраны меньше 575.98px и больше 1440px
Для упрощения адаптивной вёрстки желательно использовать Flexbox, Grid.
Желательно стараться использовать не фиксированные, а относительные величины (%, vw, vh, em, rem и так далее)
@media запросы
Существует два подхода адаптивной вёрстки по размерам области просмотра (viewport) — Mobile First и Desktop First.
При Mobile First верстаем от меньшего экрана к большему и применяем
При Desktop First верстаем от большего экрана к меньшему и применяем
На практике Mobile First встречается реже, чем Desktop First, поэтому обычно сначала верстаем макет для больших экранов, затем с помощью @media запросов адаптируем макет под меньшие экраны, используя контрольные точки (breakpoints).
@media запросы записываются в CSS файле следующим образом
Разница в 0.02px нужна для избежания пересечения @media запросов, чтобы разные стили не применялись для двух разных @media запросов одновременно
Пиксели: px
Пиксель – это самая базовая, абсолютная и окончательная единица измерения.
Количество пикселей задаётся в настройках разрешения экрана, один – это как раз один такой пиксель на экране. Все значения браузер в итоге пересчитает в пиксели.
Пиксели могут быть дробными, например размер можно задать в . Это совершенно нормально, браузер сам использует дробные пиксели для внутренних вычислений. К примеру, есть элемент шириной в , его нужно разделить на три части – волей-неволей появляются . При окончательном отображении дробные пиксели, конечно же, округляются и становятся целыми.
Для мобильных устройств, у которых много пикселей на экране, но сам экран маленький, чтобы обеспечить читаемость, браузер автоматически применяет масштабирование.
Достоинства
Главное достоинство пикселя – чёткость и понятность
Недостатки
Другие единицы измерения – в некотором смысле «мощнее», они являются относительными и позволяют устанавливать соотношения между различными размерами
Давно на свалке: , , ,
Существуют также «производные» от пикселя единицы измерения: , , и , но они давно отправились на свалку истории.
Вот, если интересно, их значения:
- (мм) =
- (см) =
- (типографский пункт) =
- (типографская пика) =
Так как браузер пересчитывает эти значения в пиксели, то смысла в их употреблении нет.
Почему в сантиметре содержится ровно 38 пикселей?
В реальной жизни сантиметр – это эталон длины, одна сотая метра. А пиксель может быть разным, в зависимости от экрана.
Но в формулах выше под пикселем понимается «сферический пиксель в вакууме», точка на «стандартизованном экране», характеристики которого описаны в .
Поэтому ни о каком соответствии реальному сантиметру здесь нет и речи. Это полностью синтетическая и производная единица измерения, которая не нужна.
CSS Properties
align-contentalign-itemsalign-selfallanimationanimation-delayanimation-directionanimation-durationanimation-fill-modeanimation-iteration-countanimation-nameanimation-play-stateanimation-timing-functionbackface-visibilitybackgroundbackground-attachmentbackground-blend-modebackground-clipbackground-colorbackground-imagebackground-originbackground-positionbackground-repeatbackground-sizeborderborder-bottomborder-bottom-colorborder-bottom-left-radiusborder-bottom-right-radiusborder-bottom-styleborder-bottom-widthborder-collapseborder-colorborder-imageborder-image-outsetborder-image-repeatborder-image-sliceborder-image-sourceborder-image-widthborder-leftborder-left-colorborder-left-styleborder-left-widthborder-radiusborder-rightborder-right-colorborder-right-styleborder-right-widthborder-spacingborder-styleborder-topborder-top-colorborder-top-left-radiusborder-top-right-radiusborder-top-styleborder-top-widthborder-widthbottombox-decoration-breakbox-shadowbox-sizingbreak-afterbreak-beforebreak-insidecaption-sidecaret-color@charsetclearclipclip-pathcolorcolumn-countcolumn-fillcolumn-gapcolumn-rulecolumn-rule-colorcolumn-rule-stylecolumn-rule-widthcolumn-spancolumn-widthcolumnscontentcounter-incrementcounter-resetcursordirectiondisplayempty-cellsfilterflexflex-basisflex-directionflex-flowflex-growflex-shrinkflex-wrapfloatfont@font-facefont-familyfont-feature-settingsfont-kerningfont-sizefont-size-adjustfont-stretchfont-stylefont-variantfont-variant-capsfont-weightgapgridgrid-areagrid-auto-columnsgrid-auto-flowgrid-auto-rowsgrid-columngrid-column-endgrid-column-gapgrid-column-startgrid-gapgrid-rowgrid-row-endgrid-row-gapgrid-row-startgrid-templategrid-template-areasgrid-template-columnsgrid-template-rowshanging-punctuationheighthyphens@importisolationjustify-content@keyframesleftletter-spacingline-heightlist-stylelist-style-imagelist-style-positionlist-style-typemarginmargin-bottommargin-leftmargin-rightmargin-topmax-heightmax-width@mediamin-heightmin-widthmix-blend-modeobject-fitobject-positionopacityorderoutlineoutline-coloroutline-offsetoutline-styleoutline-widthoverflowoverflow-xoverflow-ypaddingpadding-bottompadding-leftpadding-rightpadding-toppage-break-afterpage-break-beforepage-break-insideperspectiveperspective-originpointer-eventspositionquotesresizerightrow-gapscroll-behaviortab-sizetable-layouttext-aligntext-align-lasttext-decorationtext-decoration-colortext-decoration-linetext-decoration-styletext-indenttext-justifytext-overflowtext-shadowtext-transformtoptransformtransform-origintransform-styletransitiontransition-delaytransition-durationtransition-propertytransition-timing-functionunicode-bidiuser-selectvertical-alignvisibilitywhite-spacewidthword-breakword-spacingword-wrapwriting-modez-index
Why Use rem Units:
The greatest power that units offer is not just that they give consistent sizing regardless of element inheritance. Rather, it’s that they give us a way to have user font size settings influence every single aspect of a site’s layout by using units where we used to use units.
For this reason the primary purpose of using units should be to ensure that whatever default font size a user has their browser set to, the layout will adjust to accommodate the size of text within it.
A site can be designed initially focusing on the most common default browser font size of 16px.
Browser font size 16px
But by using units, if a user increases their font size, the integrity of the layout will be preserved, and the text won’t get squashed up in a rigid space meant for smaller text.
Browser font size 34px
And if the user decreases their font size, the entire layout scales down, and they won’t be left with a tiny smattering of text in a wasteland of white space.
Browser font size 9px
Users change font size settings for all kinds of reasons, from strained eyesight to choosing optimum settings for devices that can be vastly different in size and viewing distance. Accommodating these settings allows for much better user experiences.
Important to Know:
Some designers use based layouts in conjunction with a fixed unit setting on the element. This is typically done so that a change of font size on the element can scale overall the design up or down.
I strongly advise against this as it overrides the font size the element inherits from the user’s browser settings. Hence this prevents the settings from having any effect, and removes the user’s ability to optimize for best viewing.
If you do want to change the font size on the element, do so with an or value as the root font size will then still be a multiple of the user’s browser font size setting.
This will still allow you to scale your design up or down by changing your element’s font size, but you’ll preserve the effect of user browser settings.
rem Unit
The rem unit, short for root em is a relative unit that’ll always be based upon the font-size value of the root element, which is the element. And if the element doesn’t have a specified font-size, the browser default of 16px is used.
So that means that, by using the rem unit, the values of parent elements are ignored, and only the value of the root is taken into consideration.
With a similar example, but in rem:
I’m 15px
I’m 32px, as expected
I’m 32px, yep!
I’m 32px, like clockwork!
As you can see, using rem units allow us to avoid the compounding effect of em units. With rem things are always and consistently based on the font-size or the root element, so there are no surprises.
The same goes for other values than font-size (margin, padding,…) Using rem units on those will still be relative to the font-size of the root element.
Font Sizing with Rem Units
One of the pioneers of using rem units for font sizing is Jonathan Snook with his Font sizing with REM article, back in May, 2011. Like many other CSS developers, he had to face the problems that em units bring in complex layouts.
At that time, older versions of IE still had large market shares and they were unable to zoom text that was sized with pixels. However, as we saw earlier, it is very easy to lose track of nesting and get unexpected results with em units.
The main issue with using rem for font sizing is that the values are somewhat difficult to use. Let’s see an example of some common font sizes expressed in rem units, assuming, of course, that the base size is 16px:
- 10px = 0.625rem
- 12px = 0.75rem
- 14px = 0.875rem
- 16px = 1rem (base)
- 18px = 1.125rem
- 20px = 1.25rem
- 24px = 1.5rem
- 30px = 1.875rem
- 32px = 2rem
As we can see, these values are not very convenient for making calculations. For this reason, Snook used a trick called “62.5%“. It was not a new discovery, by any means, as it was already used with em units:
As rem units are relative to the root element, Snook’s variant of the solution becomes:
One also had to take into account the other browsers that didn’t support rem. Thus the code from above would have actually been written this way:
While this solution seems to be close to the status of a “golden rule”, there are people who advise against using it blindingly. Harry Roberts writes his own take on the use of rem units. In his opinion, while the 62.5% solution makes calculation easier (as the font sizes in are 10 times their rem values), it ends up forcing developers to explicitly rewrite all the font sizes in their website.
A third view comes from Chris Coyier of CSS-Tricks. His solution makes use of all three units we encountered so far. He keeps the root size defined in , modules defined with rem units, and elements inside modules sized with em. This approach makes easier to manipulate global size, which scales the type in the modules, while the module content is scaled based on the module font size itself. Louis Lazaris discussed that latter concept in The Power of em Units in CSS.
In the example below you can see how Chris’s approach would look:
See the Pen One Method for Using ems and rems in CSS by SitePoint (@SitePoint) on CodePen.
In practice, there are major frameworks such as Bootstrap 4 and the guidelines that use rem units for sizing text content.
A special mention goes to , a very popular collection of React components. Not only are they sizing text the same way, but also offer a mechanism to implement the “10px simplification” we mentioned above.
Another recent project, Every Layout, combines em and rem units in a very inspired way. It comes closest to Chris Coyier’s model outline earlier and it uses em units to emphasize inline elements like SVG icons, spans or other similar elements.
As you can see, there is no “silver bullet” solution. The combinations possible are limited only by the imagination of the developers.
What About rems and Sass?
The in CSS always inherits its value from the base font size setting on the root element of the document, irrespective of the computed font size. In HTML, the root element is always the element. So you could use rems, but this would mean you’ll have to control all components on the page using the font size on that element. It could work on certain projects, but I think this technique works best when focusing the resizability on an isolated component, rather than the whole document.
As for using a preprocessor like Sass, I think that’s a side point. Ultimately, your compiled stylesheet will use whatever units you’re using in your Sass code, and the inheritance will work the same way.
CSS Properties
align-contentalign-itemsalign-selfallanimationanimation-delayanimation-directionanimation-durationanimation-fill-modeanimation-iteration-countanimation-nameanimation-play-stateanimation-timing-functionbackface-visibilitybackgroundbackground-attachmentbackground-blend-modebackground-clipbackground-colorbackground-imagebackground-originbackground-positionbackground-repeatbackground-sizeborderborder-bottomborder-bottom-colorborder-bottom-left-radiusborder-bottom-right-radiusborder-bottom-styleborder-bottom-widthborder-collapseborder-colorborder-imageborder-image-outsetborder-image-repeatborder-image-sliceborder-image-sourceborder-image-widthborder-leftborder-left-colorborder-left-styleborder-left-widthborder-radiusborder-rightborder-right-colorborder-right-styleborder-right-widthborder-spacingborder-styleborder-topborder-top-colorborder-top-left-radiusborder-top-right-radiusborder-top-styleborder-top-widthborder-widthbottombox-decoration-breakbox-shadowbox-sizingcaption-sidecaret-color@charsetclearclipcolorcolumn-countcolumn-fillcolumn-gapcolumn-rulecolumn-rule-colorcolumn-rule-stylecolumn-rule-widthcolumn-spancolumn-widthcolumnscontentcounter-incrementcounter-resetcursordirectiondisplayempty-cellsfilterflexflex-basisflex-directionflex-flowflex-growflex-shrinkflex-wrapfloatfont@font-facefont-familyfont-kerningfont-sizefont-size-adjustfont-stretchfont-stylefont-variantfont-weightgridgrid-areagrid-auto-columnsgrid-auto-flowgrid-auto-rowsgrid-columngrid-column-endgrid-column-gapgrid-column-startgrid-gapgrid-rowgrid-row-endgrid-row-gapgrid-row-startgrid-templategrid-template-areasgrid-template-columnsgrid-template-rowshanging-punctuationheighthyphens@importisolationjustify-content@keyframesleftletter-spacingline-heightlist-stylelist-style-imagelist-style-positionlist-style-typemarginmargin-bottommargin-leftmargin-rightmargin-topmax-heightmax-width@mediamin-heightmin-widthobject-fitopacityorderoutlineoutline-coloroutline-offsetoutline-styleoutline-widthoverflowoverflow-xoverflow-ypaddingpadding-bottompadding-leftpadding-rightpadding-toppage-break-afterpage-break-beforepage-break-insideperspectiveperspective-originpointer-eventspositionquotesresizerighttab-sizetable-layouttext-aligntext-align-lasttext-decorationtext-decoration-colortext-decoration-linetext-decoration-styletext-indenttext-justifytext-overflowtext-shadowtext-transformtoptransformtransform-origintransform-styletransitiontransition-delaytransition-durationtransition-propertytransition-timing-functionunicode-bidiuser-selectvertical-alignvisibilitywhite-spacewidthword-breakword-spacingword-wrapz-index
vh и vw
Адаптивный веб-дизайн полностью полагается на процентные соотношения. Но использование процентов CSS не всегда является лучшим решением. CSS ширина всегда относительна ближайшего родительского элемента. Но что если вы хотите использовать ширину или высоту viewport вместо таковых родительского элемента? Это как раз тот случай, когда стоит использовать и .
равен 1/100 высоты viewport. Например, если высота браузера , будет равен 9px. Таким же образом, если ширина равна , то будет равен .
Вариантов использования этих правил множество. Например, простым способом сделать слайды в полную высоту будет написание всего одной строчки кода:
Представьте, что вам необходимо сделать заголовок, который займет всю ширину экрана. Чтобы сделать это, следует задать размер шрифта в . Этот размер будет увеличиваться вместе с размером экрана.
ex и ch
Единицы и , по аналогии с и , соотносятся с текущим шрифтом и размером шрифта. Но, в отличие от и , они также соотносятся c .
или character является продвинутой единицей измерения ширины от нуля, . Наиболее интересные обсуждения того, что это может значить, можно найти в блоге Эрика Мейерса. Вкратце, если мы возьмем моноширинный шрифт, контейнер с шириной из букв, тогда, например, всегда будет содержать выражение из 40 единиц этого конкретного шрифта. Когда стандартным использованием этого правила является пример шрифта Брайля, возможности творческого подхода существенно расширяют его функционал.
обозначается как «x-высота текущего шрифта ИЛИ половина «. выбранного шрифта называется высота буквы x нижнего регистра этого шрифта. Часто эта высота оказывается срединной точки всей высоты шрифта.
X-высота; высота буквы x нижнего регистра (читайте больше про структуру веб типографики)
Для этой единицы измерения существует множество вариантов использования, большинство из них являются небольшими дополнениями к основной типографике. Например, элемент , который обозначает надстрочные символы, может быть приподнят относительно своей позиции, если ему задать position: relative и значение свойства bottom 1ex. Таким же образом вы можете опустить подстрочные буквы еще ниже. Стандартные настройки браузера использует свои правила надстрочных и подстрочных символов. Но если вам нужна более тонкая настройка, вы можете сделать ее следующим образом:
Могу ли я это использовать?
Единица существует примерно , а вот для такой поддержки вы не найдете. Для ознакомления со спецификацией по поддержке свойств, ознакомьтесь со значениями и единицами CSS в блоге Эрика Мейерса.
Предотвращение наследования
Когда переменные CSS используются для хранения данных, их поведение по умолчанию — наследование — желательно. Определяем переменные в корневом элементе и можем переопределять их в поддереве. Но наследование часто мешает. Рассмотрим следующий пример, в котором используется переменная для применения тонкого свечения с предопределенным цветом, смещением и радиусом размытия, но с переменным разбросом:
See this code Cancelling inheritance on x.xhtml.ru.
Это приводит к тому, что тонкое свечение применяется не только к элементу , но и к любому из его дочерних элементов, включая ссылки , выделение и т.д.
Чтобы это исправить, нужно отключить наследование, добавив к первому правилу. Поскольку прямое приложение всегда имеет приоритет над унаследованными правилами, оно переопределит унаследованные значения, но из-за низкой специфичности оно уступит место всему, что указано в элементе.
Why Use em Units
The key value units offer is they allow sizing values to be determined by a font size other than that of the element.
For this reason, the primary purpose of units should be to allow for scalability within the context of a specific design element.
For example, you might set the , and around a navigation menu item to use values.
Menu with 0.9rem font size
This way if you change the menu’s font size the spacing around the menu items will scale proportionately, independently of the rest of the layout.
Menu with 1.2rem font size
In the earlier section on inheritance you saw how quickly keeping track of units can get out of hand. For this reason, I recommend only using units if you identify a clear need for them.
Поддержка CSS-переменных браузерами
 CSS Variables (Custom Properties). https://caniuse.com/
CSS-переменные поддерживаются в браузерах более 95% пользователей. В браузере, который не поддерживает CSS-переменные, не будет работать и функция . Случай уже редкий, но как и прежде, для каждой новой CSS-функции, можно использовать каскадность CSS. Вот пример:
В зависимости от реализации CSS-переменных в браузере и значения может быть четыре варианта развития событий:
- Если браузер не поддерживает CSS-переменные, он будет игнорировать для вторую строку и применит красный цвет для фона.
- Если браузер поддерживает CSS-переменные, значение в соответствует цвету, это значение будет применено для фона.
- Если браузер поддерживает CSS-переменные, но не установлен, будет использоваться оранжевый — это запасной вариант из второго аргумента .
- Если браузер поддерживает CSS-переменные, а будет содержать бессмысленное значение для свойства (например, вместо ожидаемого цвета), фон окажется прозрачным.
Последний вариант довольно неожиданный, т.к. предусмотрен вариант на случай, когда свойство не работает а в случае без переменных, код выглядел бы так:
В таком случае должен примениться красный цвет, т.к. браузер проигнорирует вторую строку вместе со всем, что ему будет не понятно. В примере кода, где указано в значении свойства без использования переменных, браузер избавится от неправильного свойства во время синтаксического анализа.В случае с переменной, браузер узнает, действительно ли ее объявление, гораздо позже. К этому времени он уже отбросит остальные каскадные значения (т.к. он должен содержать только одно вычисленное значение) и, не сумев разобрать пару свойство-значение, вернётся к исходному значению — в данном случае прозрачному.
CSS Properties
align-contentalign-itemsalign-selfallanimationanimation-delayanimation-directionanimation-durationanimation-fill-modeanimation-iteration-countanimation-nameanimation-play-stateanimation-timing-functionbackface-visibilitybackgroundbackground-attachmentbackground-blend-modebackground-clipbackground-colorbackground-imagebackground-originbackground-positionbackground-repeatbackground-sizeborderborder-bottomborder-bottom-colorborder-bottom-left-radiusborder-bottom-right-radiusborder-bottom-styleborder-bottom-widthborder-collapseborder-colorborder-imageborder-image-outsetborder-image-repeatborder-image-sliceborder-image-sourceborder-image-widthborder-leftborder-left-colorborder-left-styleborder-left-widthborder-radiusborder-rightborder-right-colorborder-right-styleborder-right-widthborder-spacingborder-styleborder-topborder-top-colorborder-top-left-radiusborder-top-right-radiusborder-top-styleborder-top-widthborder-widthbottombox-decoration-breakbox-shadowbox-sizingbreak-afterbreak-beforebreak-insidecaption-sidecaret-color@charsetclearclipclip-pathcolorcolumn-countcolumn-fillcolumn-gapcolumn-rulecolumn-rule-colorcolumn-rule-stylecolumn-rule-widthcolumn-spancolumn-widthcolumnscontentcounter-incrementcounter-resetcursordirectiondisplayempty-cellsfilterflexflex-basisflex-directionflex-flowflex-growflex-shrinkflex-wrapfloatfont@font-facefont-familyfont-feature-settingsfont-kerningfont-sizefont-size-adjustfont-stretchfont-stylefont-variantfont-variant-capsfont-weightgapgridgrid-areagrid-auto-columnsgrid-auto-flowgrid-auto-rowsgrid-columngrid-column-endgrid-column-gapgrid-column-startgrid-gapgrid-rowgrid-row-endgrid-row-gapgrid-row-startgrid-templategrid-template-areasgrid-template-columnsgrid-template-rowshanging-punctuationheighthyphens@importisolationjustify-content@keyframesleftletter-spacingline-heightlist-stylelist-style-imagelist-style-positionlist-style-typemarginmargin-bottommargin-leftmargin-rightmargin-topmax-heightmax-width@mediamin-heightmin-widthmix-blend-modeobject-fitobject-positionopacityorderoutlineoutline-coloroutline-offsetoutline-styleoutline-widthoverflowoverflow-xoverflow-ypaddingpadding-bottompadding-leftpadding-rightpadding-toppage-break-afterpage-break-beforepage-break-insideperspectiveperspective-originpointer-eventspositionquotesresizerightrow-gapscroll-behaviortab-sizetable-layouttext-aligntext-align-lasttext-decorationtext-decoration-colortext-decoration-linetext-decoration-styletext-indenttext-justifytext-overflowtext-shadowtext-transformtoptransformtransform-origintransform-styletransitiontransition-delaytransition-durationtransition-propertytransition-timing-functionunicode-bidiuser-selectvertical-alignvisibilitywhite-spacewidthword-breakword-spacingword-wrapwriting-modez-index
Абсолютные единицы измерения длины в CSS
Абсолютные единицы измерения CSS не подходят для веб-дизайна. Они представляют собой цифровое обозначение результатов измерений в физическом мире и не зависят от размера и разрешения экрана. Абсолютные длины с одним и тем же значением могут отличаться на разных экранах. Это вызвано различием DPI экрана (точек на дюйм).
Экраны высокого разрешения имеют более высокий показатель DPI по сравнению с экранами меньшего разрешения, благодаря чему на них изображения и текст выглядят меньше. Абсолютные единицы используются при определении стилей в полиграфии, где измерения происходят в дюймах, пунктах и пиках.
Абсолютные единицы измерения длины:
- cm (сантиметры);
- mm (миллиметры);
- in (дюймы);
- pc (пики);
- pt (пункты);
- px (пиксели).
Большинство абсолютных единиц длины бесполезны в интернете. Единственным исключением является px. Пиксели являются относительными единицами по отношению к разрешению экранов. Для принтеров и мониторов с очень высоким разрешением один пиксель в CSS равняется нескольким пикселям на экране, так что число px на дюйм составляет около 96. Пиксель является наименьшей единицей измерения и обычно используется в качестве ориентира для других.
vmin и vmax
В то время как и всегда относятся к высоте и ширине viewport, и относятся к минимальной и максимальной ширине или высоте viewport, в зависимотсти от того, какая из величин больше, а какая меньше. Например, если ширина окна браузера задана в 1100px, а высота в 700px, будет равен 7px, а 11px. Но, если ширина будет установлена в 800px, а высота в 1080px, то будет равен 8px, а – .
Итак, как можно воспользоваться этими значениями?
Представьте, что вам нужно создать элемент, который всегда будет находиться в видимой части экрана. Используя значения высоты и ширины , заданные меньше 100, вы сможете это осуществить. Например, элемент квадратной формы, который всегда касается как минимум двух краев экрана может быть задан так:
Если вам нужен квадратный блок, который будет покрывать весь viewport (касаться четырех сторон экрана одновремнно), используйте те же правила, но с .
Совмещая эти правила можно получить очень адаптивный и зачастую необычный способ для изменения размеров вашего viewport.